Chamomile Potatoes On Chamomile Day ~ Herbs For Kids ~

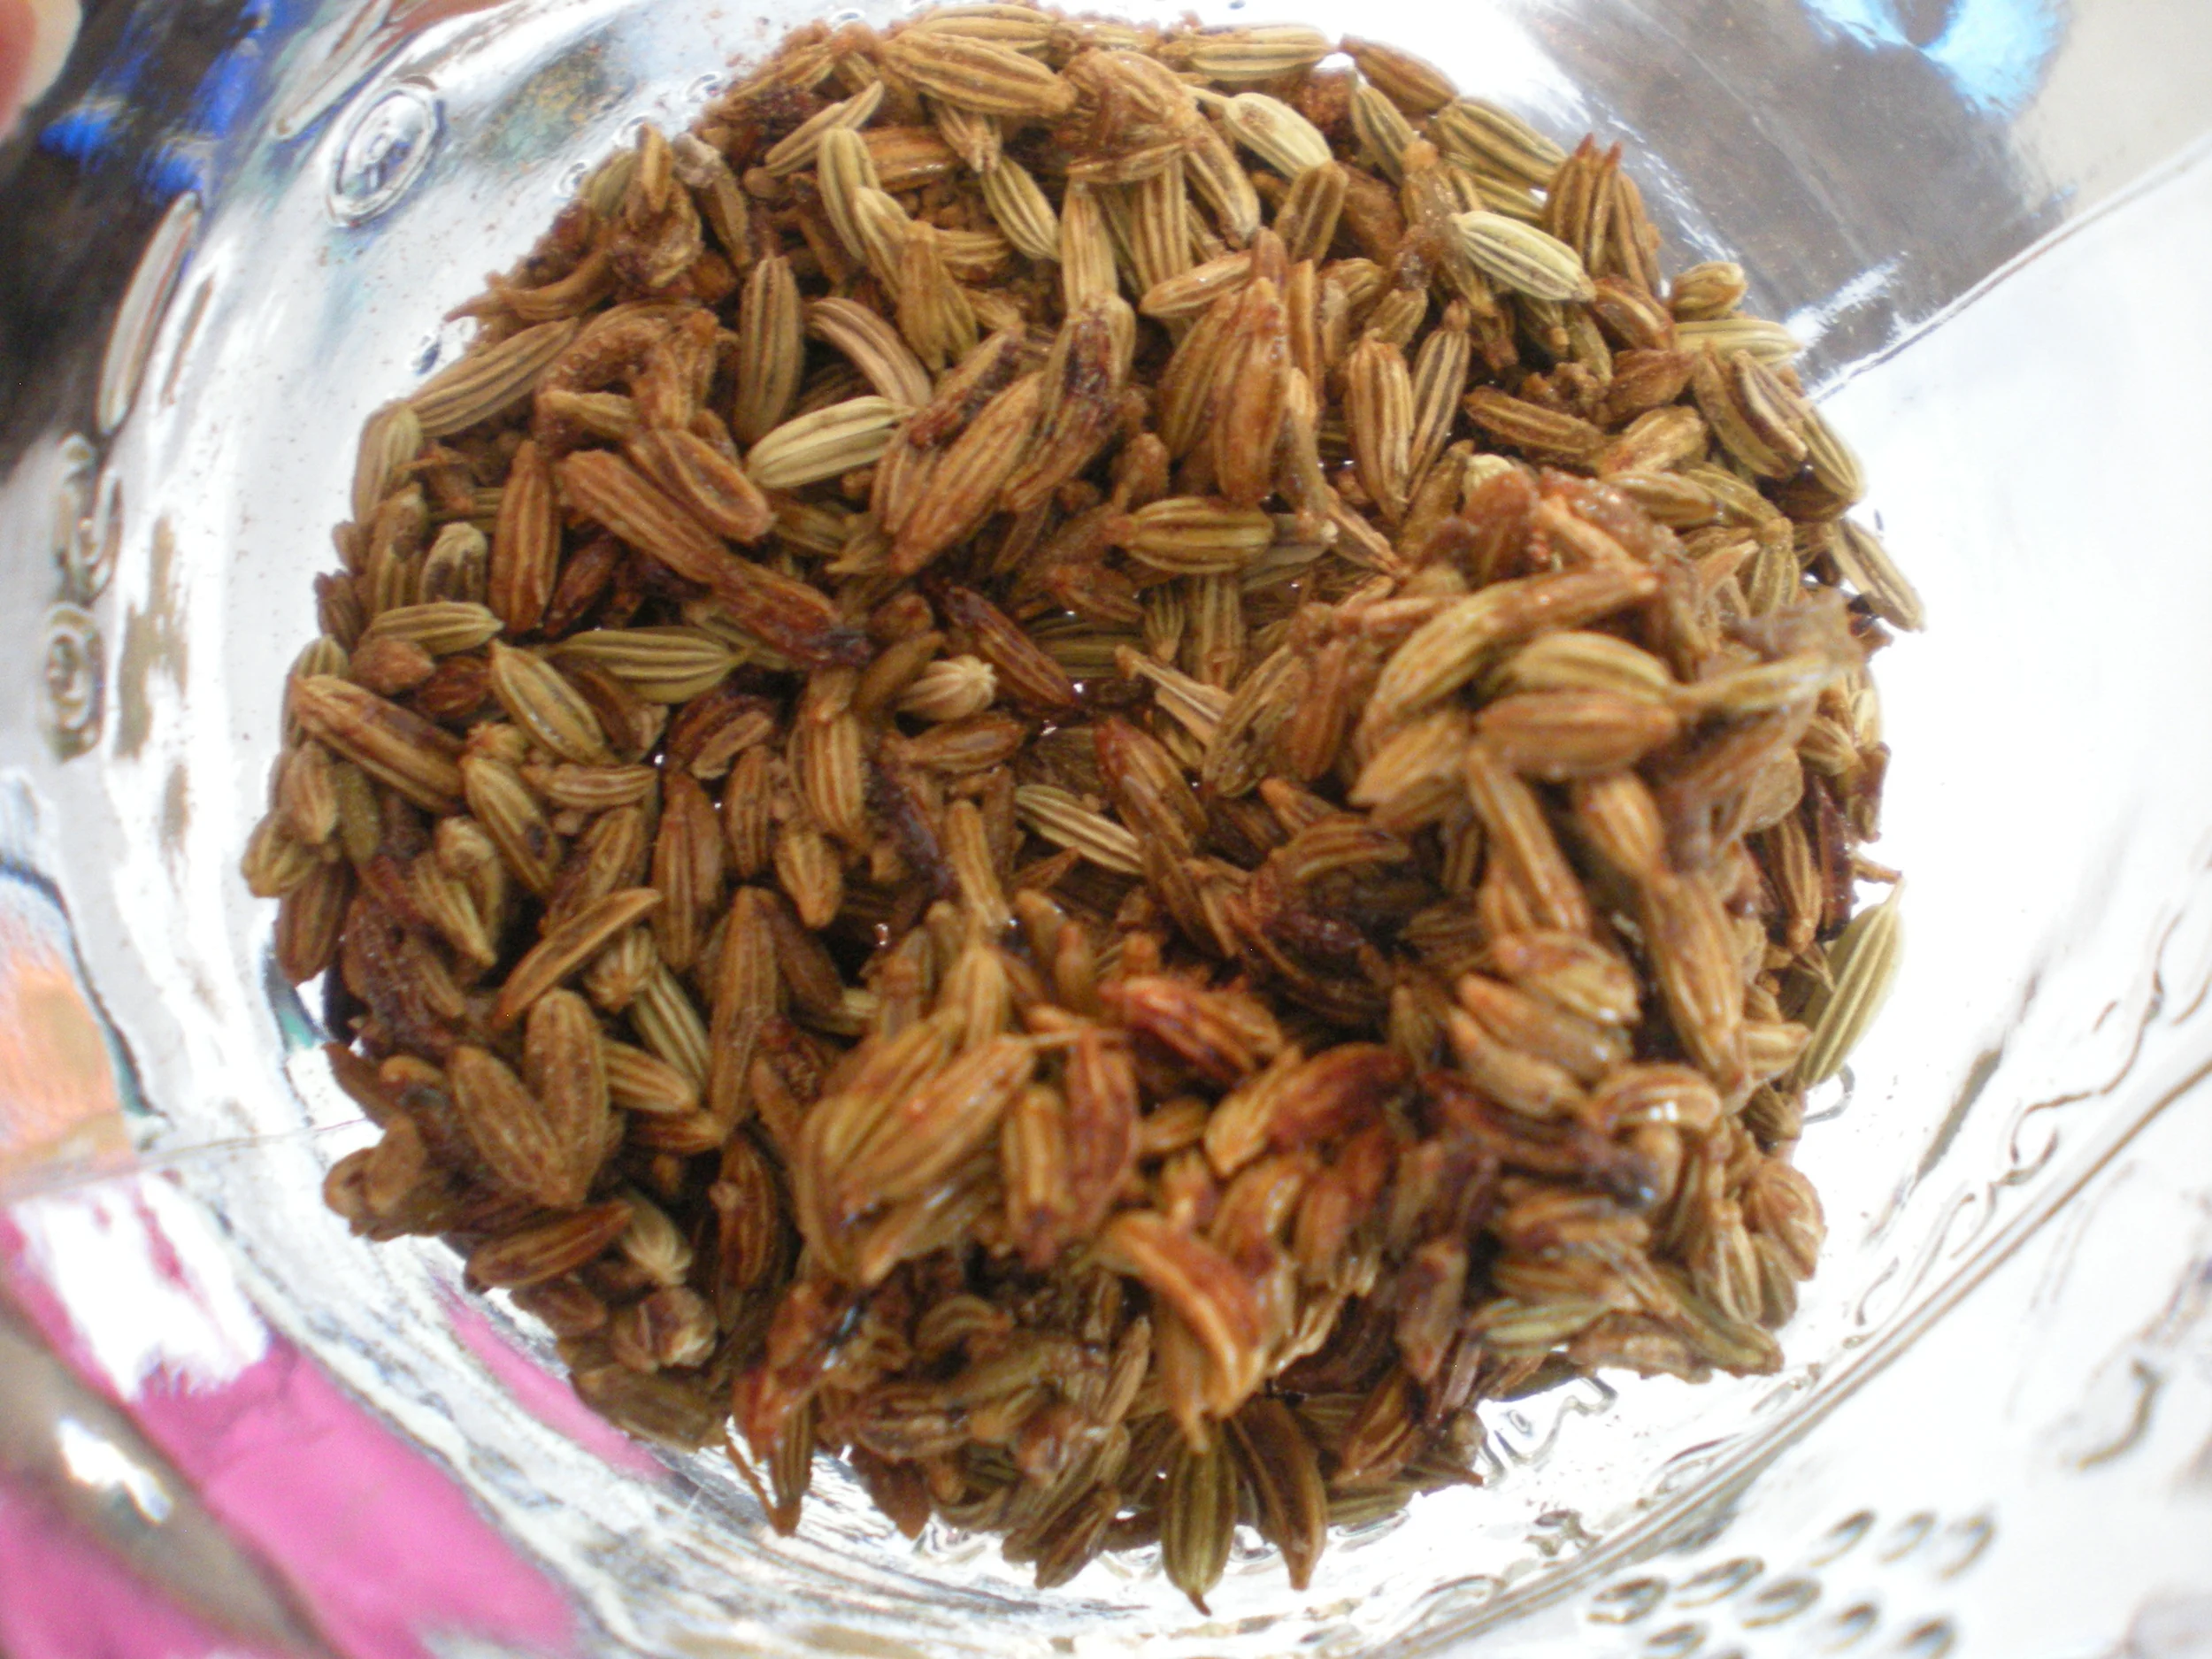
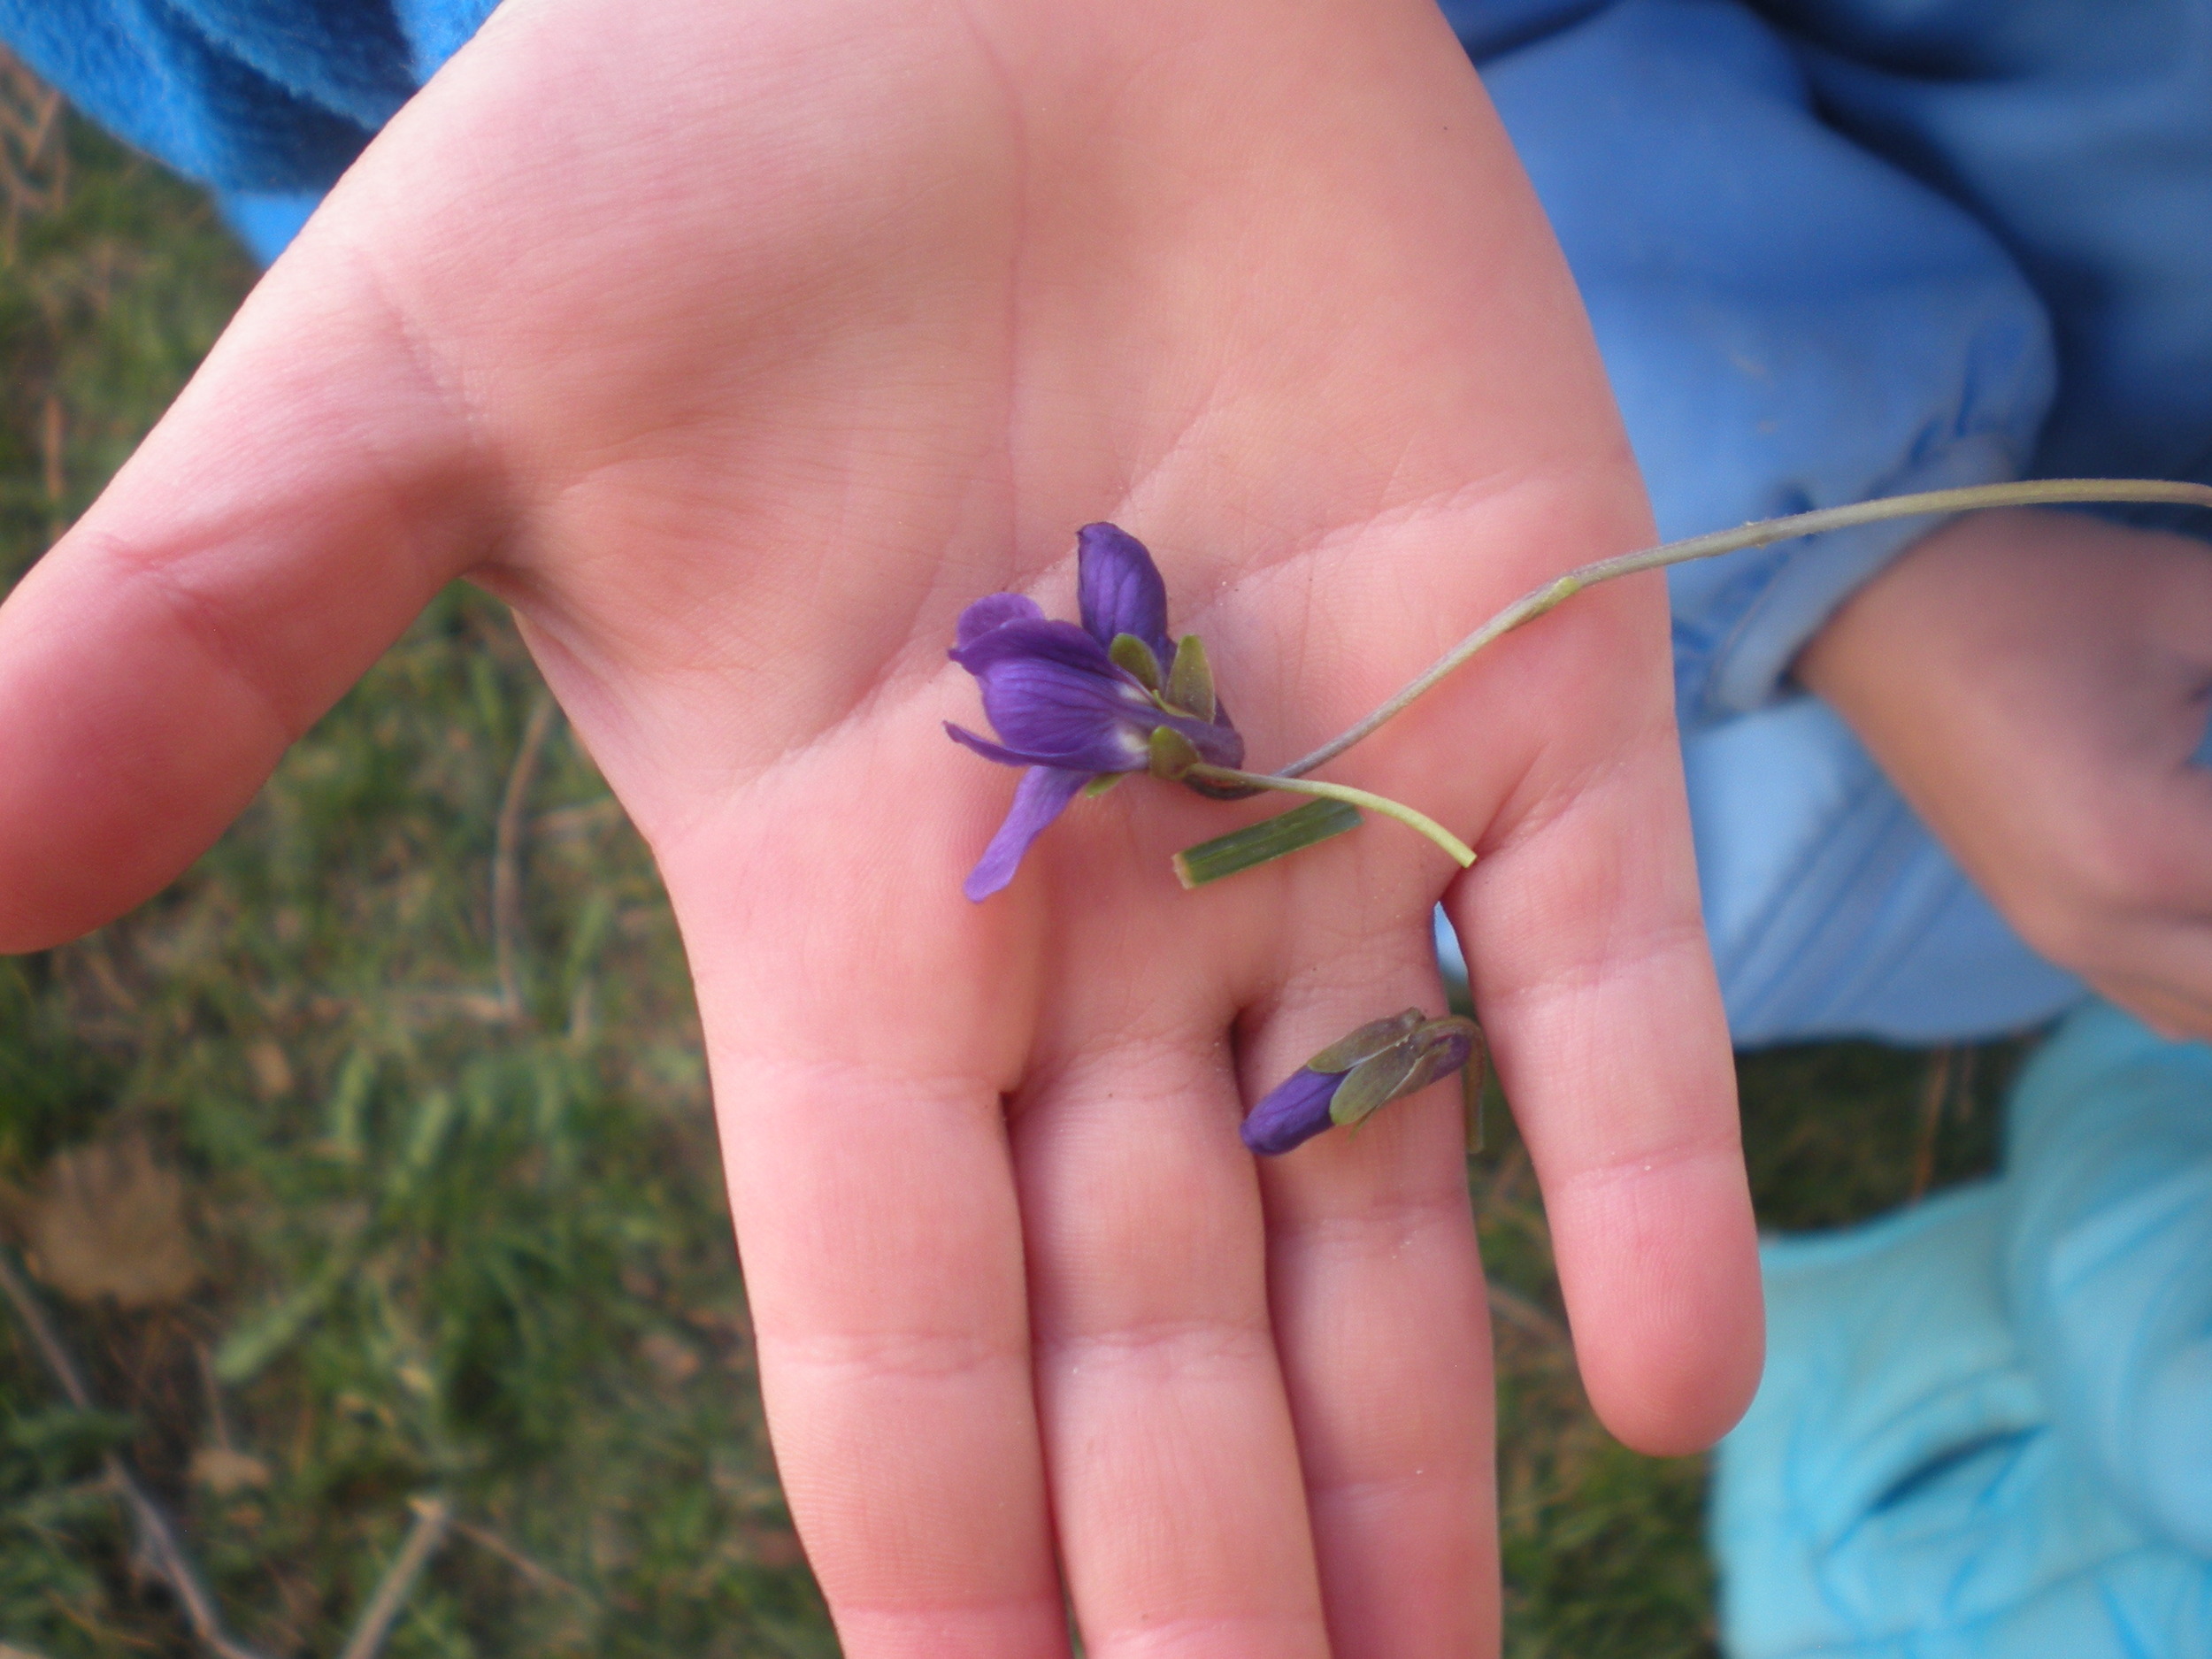
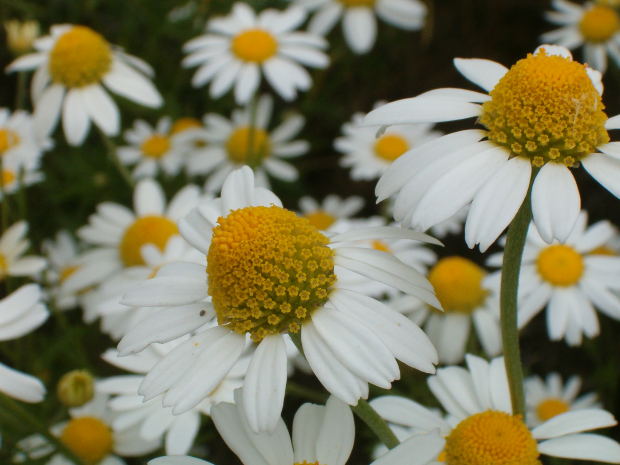
Chamomile is a super friendly herb for kids.  Chamomile is gentle while being powerful at the same time for helping kids with tummy upset especially when related to nervousness, general nervous tension, headaches and colds.

chamomile

What Does It Taste Like?

We started our day at preschool with a tea tasting which is a great way to introduce kids to a new plant.  Most children love the apple like taste of the tea made from happy sunshiny little flowers.  The kids at the school really enjoyed the tea and it seemed to help calm them down a bit... we were having another late Spring snow storm and the kids were all kinda crazy with the sudden change in the weather.

To make your own tea simple steep up to 1 tablespoon of flowers per cup in hot water for 2 to 5 minutes max.  If you steep for any longer than that chamomile tea becomes very bitter.  Of course children are very sensitive to any bitter taste.  You can add a bit of honey or agave to taste if you wish.

The Tale Of Peter Rabbit

Old Mrs. Rabbit Brings Peter Chamomile

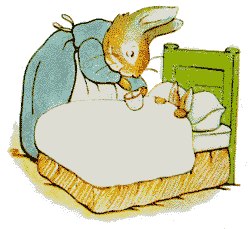
After indulging in our tea we sat down for a cozy reading of this classic tale by Beatrix Potter.  The kids were still a bit antsy and yet were really involved with the book.  Many of them having read Peter Rabbit before, knew what was to come on each and every page.  Except when we got to this little bit on the last page where they noticed one little detail which was overlooked before ~

“Peter was not very well during the evening. His mother put him to bed, and made some chamomile tea: "One table-spoonful to be taken at bedtime.” ― Beatrix PotterThe Tale of Peter Rabbit

Smiles and giggles came when the kids heard that Peter had chamomile tea, just like they did!  We talked about how scared and tired and sick Peter must have felt after has intense adventure in Mr. McGregor's garden.  It was a perfect little example from a familiar story about using herbs.

Chamomile Potatoes

I bet you are wondering what about chamomile potatoes, and so we come to the part of our day when we made these together...

These are not something yummy to eat, though I think creating some kind of recipe with these two ingredients might be interesting.  Nope, chamomile potatoes are for growing!  Potatoes make great little pots for sprouting plants, just like sprouting plants inside egg shells.

planting tiny chamomile seeds

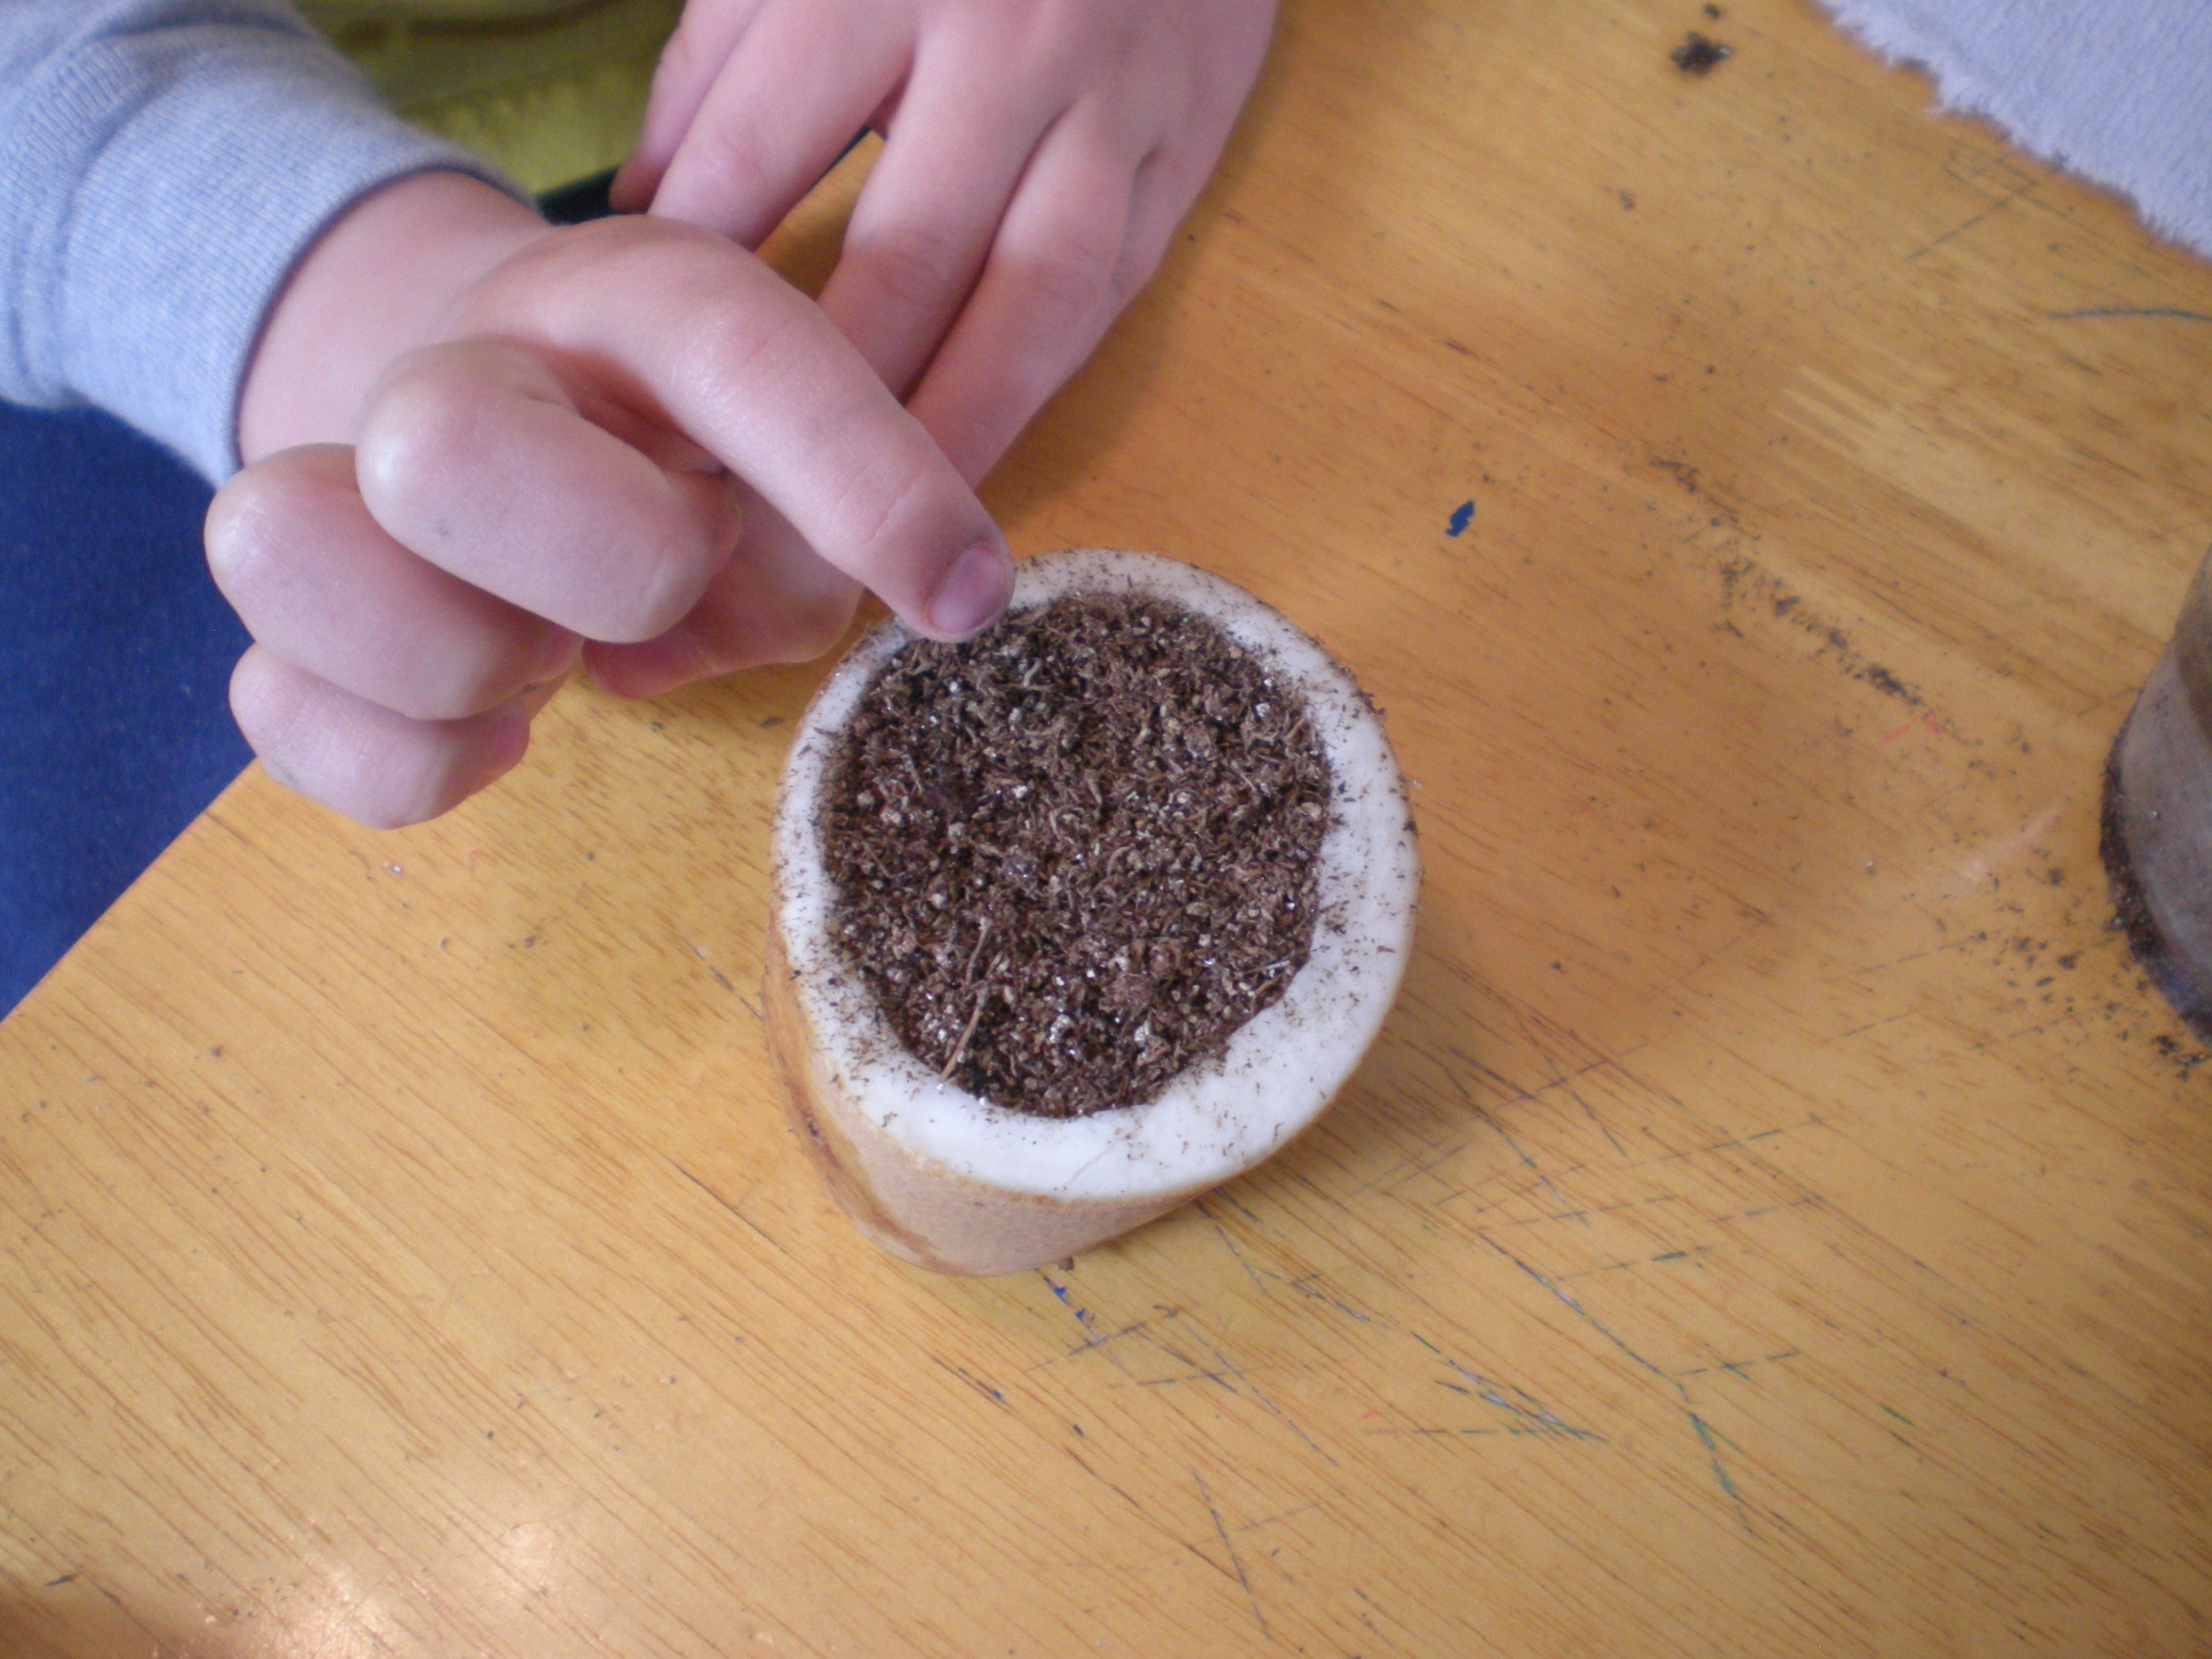
When the seeds have sprouted and are ready to be planted outside you can simply plant the whole potato in the ground.  In the past we have given created Potato Heads by using markers and googly eyes to create faces.   Then we planted grass inside the potatoes which grew into hair!  It is lots of fun to for kids to cut their Potato Head's hair with scissors.  Today we simply planted chamomile seeds into our potatoes, gave them a little drink and are eagerly waiting for them to sprout!

Materials ~

  • Potatoes, 1 for each child
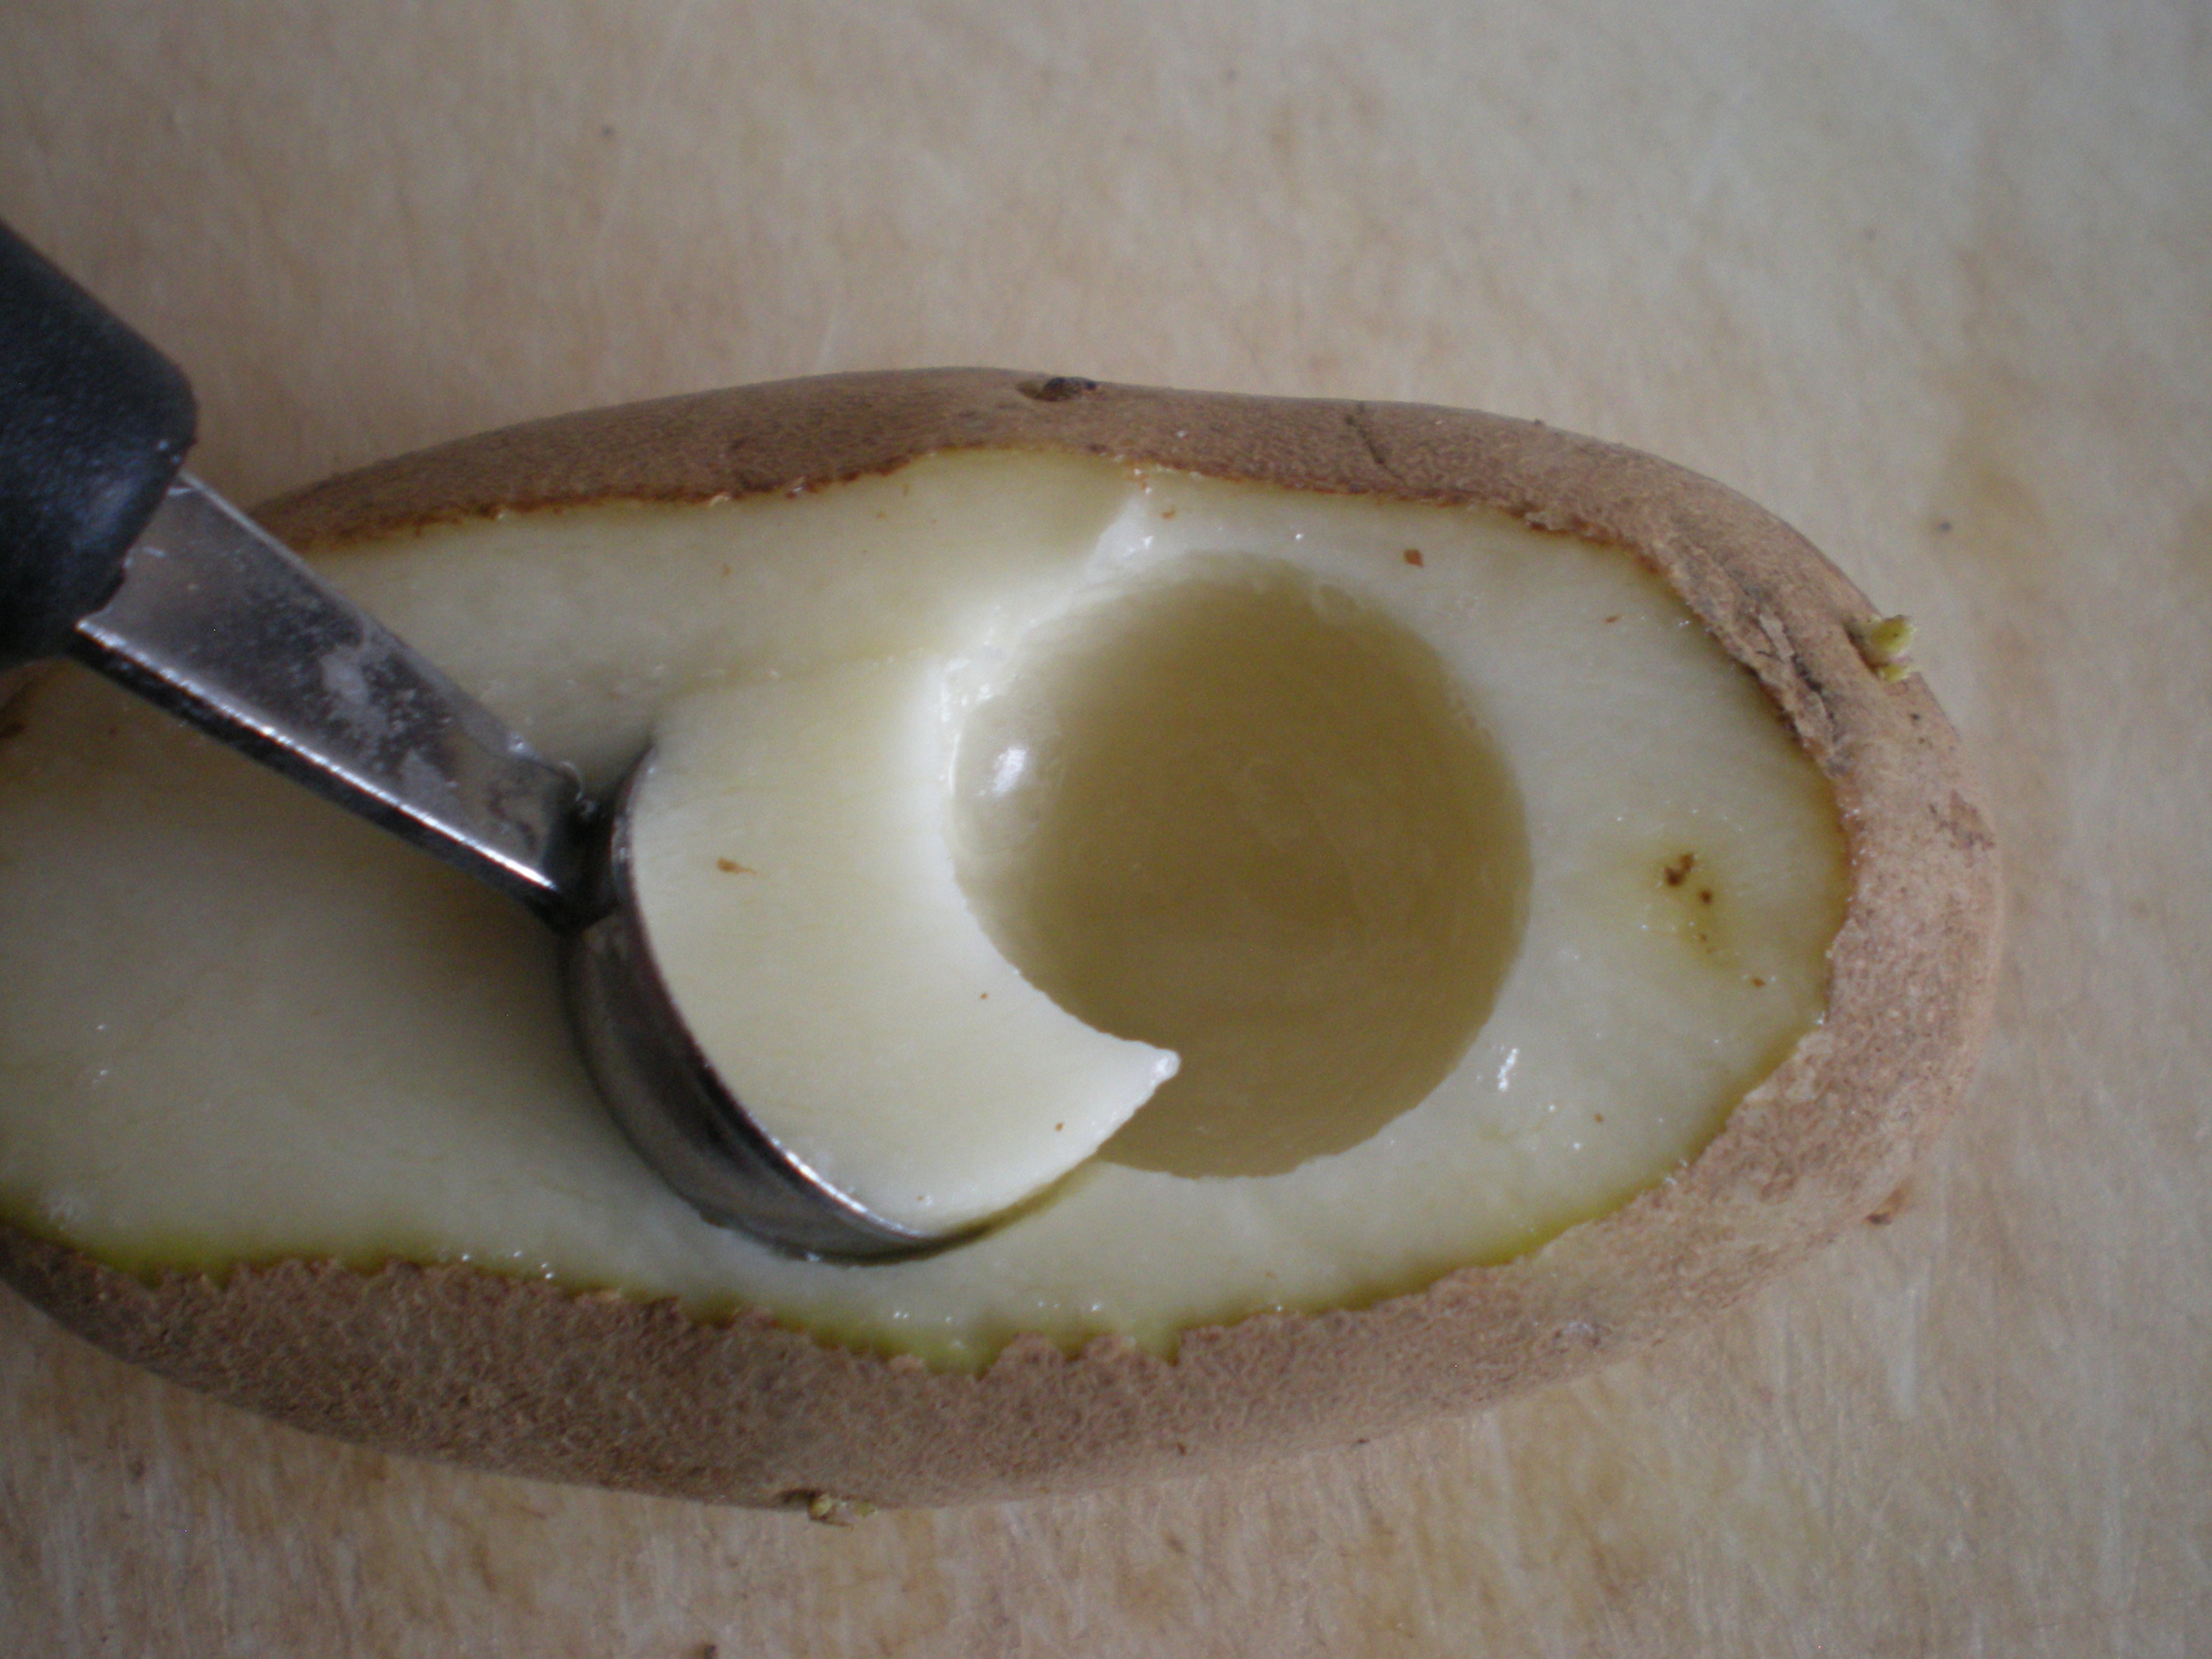
  • A Melon Baller
  • Chamomile Seeds
  • Dirt

If prepping the potatoes ahead of time you will need: 

  • Citric Acid or Lemon Juice
  • Water
  • A Big Bowl 

Instructions ~

Prep the potatoes by cutting the a thin slice off of the top of the potato or the side if the potato is long and skinny.  Then using the melon baller remove the center of the potato to make a place for the dirt to go.  Test to see if the potato will stand straight by setting it down on a flat surface.  If it wobbles or rolls around cut a flat surface on the bottom of the potato so it will stand sturdy and straight.  I did this the day before class and I wanted to keep the potatoes fresh.  So, I place the potatoes in a big bowl filled with water and a generous sprinkle of citric acid.  The potatoes came through the night beautifully!

potato prep

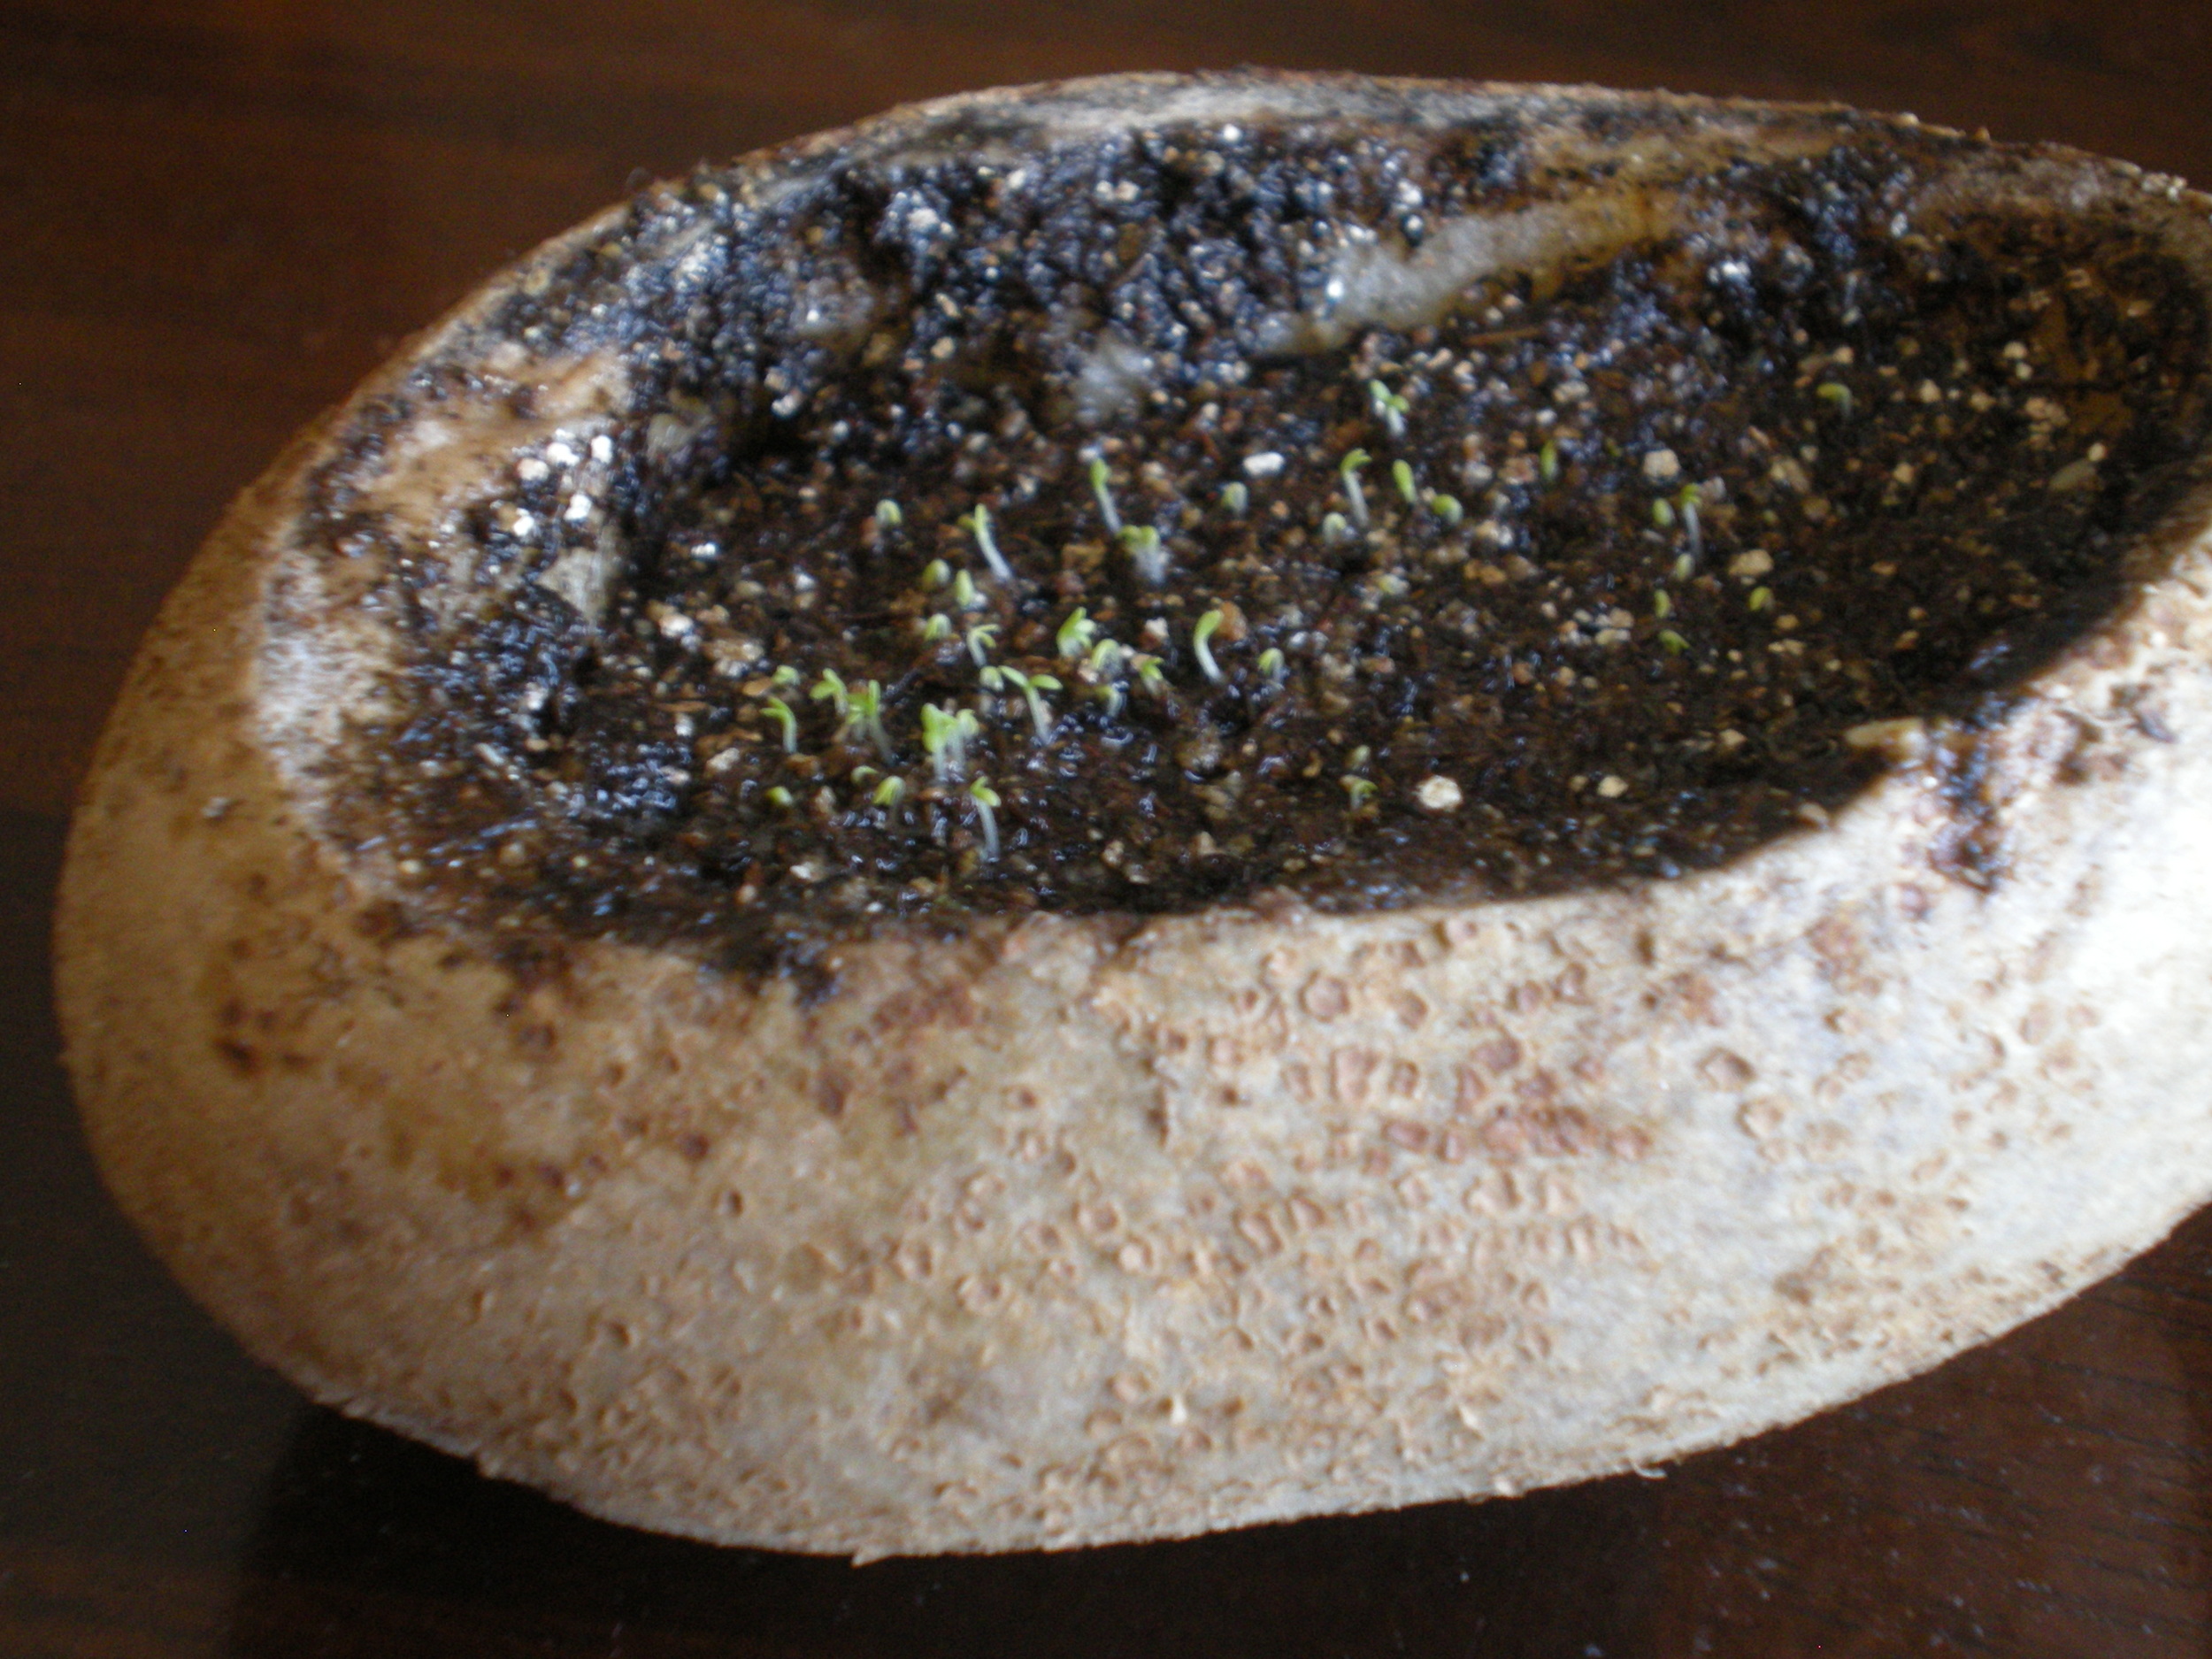
Have the children fill their potato with dirt and then gently press the tiny chamomile seeds into the top.  Help the children give their chamomile potato a small amount of water to help the seeds sprout.  

Keep the soil moist and place the potato in a sunny spot.  You should have tiny sprouts within about three days, almost instant gratification!  When my girls saw these wee little sprouts they instantly exclaimed, "Aw, how cute!"

day  three

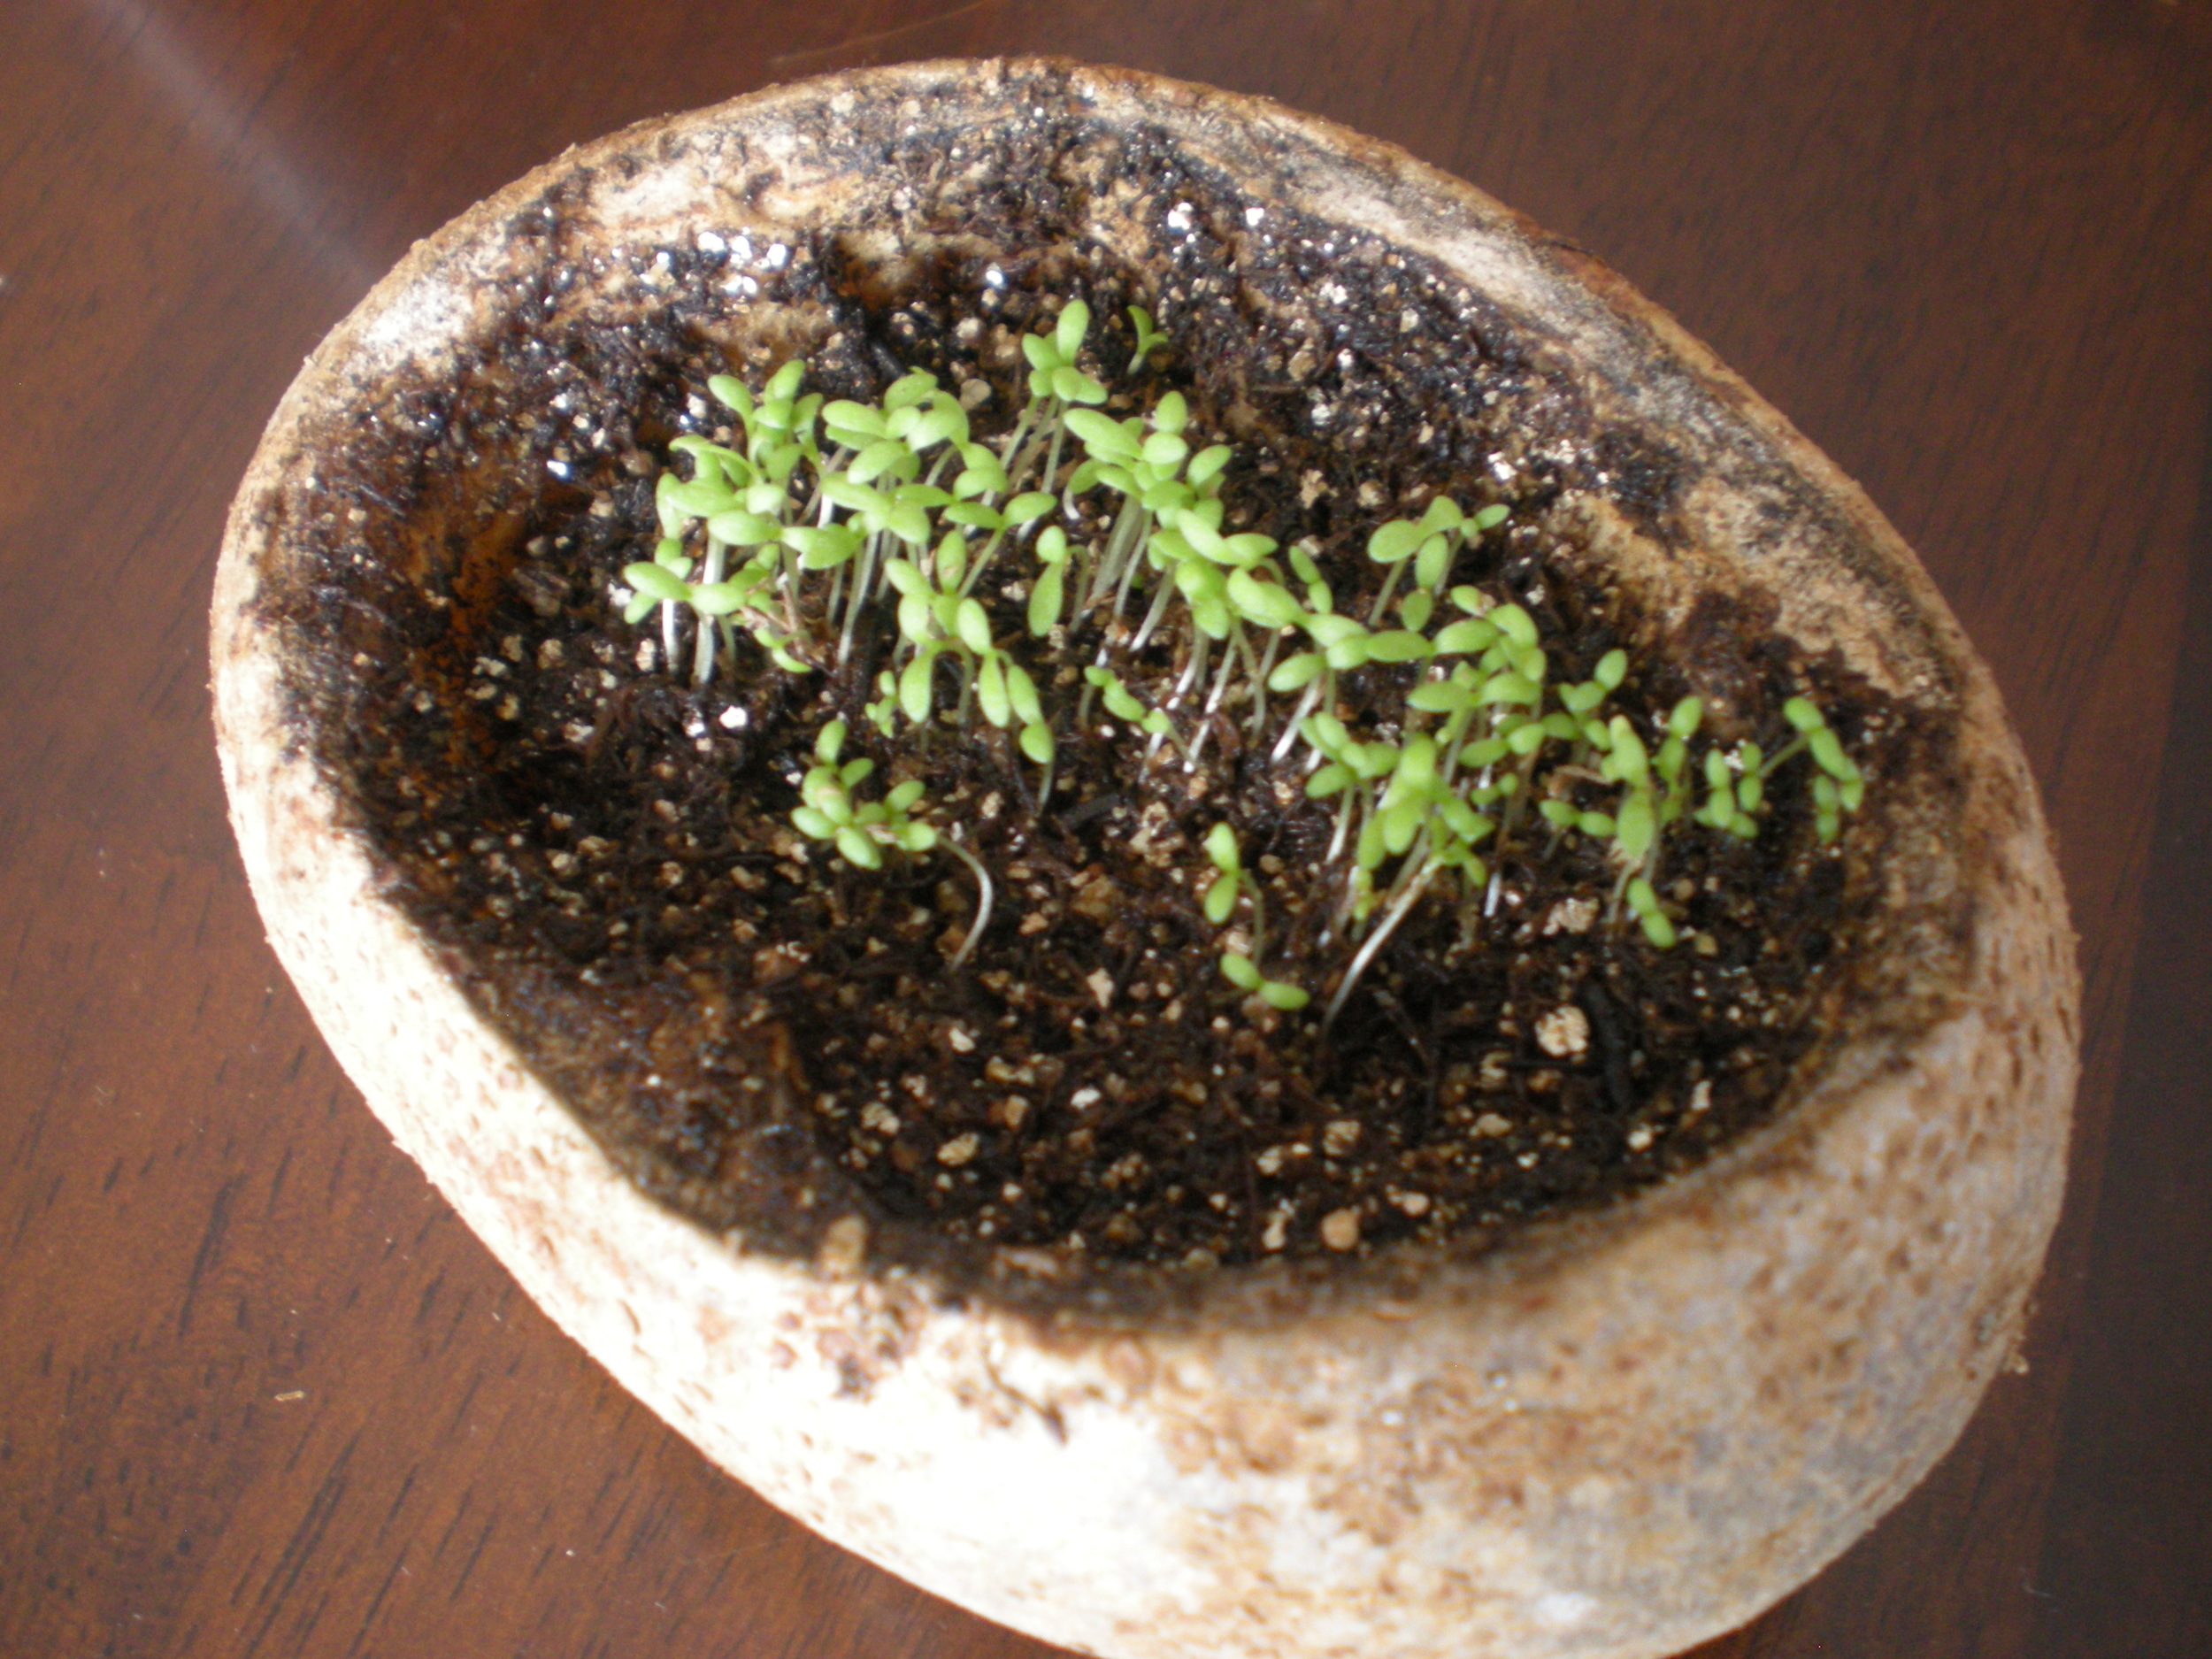
Within one week the sprouts are much bigger and follow the sun during the day, turning their leaves to soak up nourishing sunlight.

day seven

Here are some other wonderful activities for Chamomile Day ~

Spring Time Blessings!

Shared On:  It's Playtime!, Eco-Kid's Tuesday, The Kid's Co-Op, Kid's Get Crafty,  Friday's Nature Table


Fennel Babies On Fennel Day ~ Herbs For Kids ~

Tiny little seeds beckoned excited glances and little hands to explore as we began our herbal adventure this week with fennel.  Did you know that fennel is a wonderful tummy soother?  It relaxes smooth muscle, eases inflammation and even acts as an expectorant all while tasting pretty yummy!

What Does It Taste Like?

We started our day at preschool with a tea tasting as well as trying some fresh fennel bulb at snack time.  Most of the kids liked the tea and I got to refill many cups!  The fresh bulb was only embraced by a few little ones with adventurous palates.

So, what does it taste like?  Well, the tea tastes a bit sweet and smooth with a definite taste of fennel seeds.  In general I like to blend fennel seeds with other herbs for a tea but nothing beats tasting a simple infusion to really get the sense of a plant.  The bulb has a juicy crunch with a sweet anise or licorice flavor.  It is really quite lovely.

To make your own tea simple steep up to 1 tablespoon of seeds per cup in hot water for 15 to 30 minutes.  Then strain and enjoy!

Fennel Candy

We furthered our culinary exploration with fennel by making fennel candy, kinda like the kind they have to munch-on on your way out of an Indian Food restaurant.  This activity came directly from A Kid's Herb Book by Lesley Tierra.  If you haven't seen this book, you are missing out.  Totally fun and informative with tons of stories and activities for kids of all ages.

Fennel Candy
Fennel Candy

Recipe ~ From: A Kid's Herb Book

  • 1 tablespoon of fennel seeds
  • 1 teaspoon sugar, we used sucanat
  • 1/4 teaspoon of water

Combine in a pan.  Heat to dissolve the sugar and coat the seeds.

Then add:

  • 2 teaspoons fennel seeds
  • 2 teaspoons water

Fennel Babies

After we got acquainted with fennel we came to the fun hands-on part of the day, planting fennel babies!  Before planting our babies we made them a nice home, little "baskets" for them to begin their sprouting.

baby baskets
baby baskets

Materials ~

  • Cups or other container, I was lucky to find cups made from recycled materials!
  • Chenille Stems
  • Ribbons
  • Foamies or other decorations
  • Little Chicks, so cute!
  • Beads
  • Fennel Seeds, of course!  I did buy these at the local plant nursery.  I don't know if the seeds I bought at the grocery store would sprout and I didn't want to take any chances.
  • Dirt
  • Water
  • Hole Punch
  • Sharpie
Sorry mom and dad, I was slow to stop your little one from wiping dirt on his belly, so I took a picture

Instructions ~

  • PREPARE ~ Punch at least two holes opposite each other just under the rim of the cups.  If you want to add a ribbon decoration around the top of the cup then punch holes all the way around the rim of the cup.  
  • RIBBON WEAVE ~ If doing the ribbon decoration, have the child pick out a ribbon.  Leave enough ribbon sticking out from where you start the weaving to attach it when you are done weaving.  Then help the child thread it in and out of the holes around the top of the cup so it is woven around the perimeter of the rim and attach it the the other end by tying a bow.   I didn't do this part with the kids this time, so I don't have a picture to show you.  My hole punch was not working well and I was lucky to get the two necessary holes punched in each cup.
  • DECORATION ~ Lay out your decorations, we used foamies, and have the kids decorate the outside of their cup.
  • CREATE A HANDLE ~ Attach a chenille stem to one of the holes you punched in the top of the cup and have the child bead the stem leaving a bit of room to attach the opposite end of the stem to the other side of the cup.
  • PLANT THE BABIES ~ Fill the cup with dirt about 2/3rd full.  Have the child poke a few holes in the dirt and put their babies (seeds) in the dirt.  Then they can give their babies a blanket by covering them with dirt.  Next give them a drink of water!  We used about 3 seeds per child incase they don't all sprout.
  • SELECT A NANNY ~ Next let the child pick out a chick to watch over their babies.  You certainly don't need to use the chicks but I just can't resist, they are SO CUTE!!  And the kids love them so much!
  • FINISH THE BASKET ~ Finally attach the loose end of the handle if you haven't done so and write the child's name on their cup.  You are all done!
baby basket
baby basket

The day ended with each child happy to take home their new babies and some candy for their families.  When their babies are strong enough and the danger of frost has passed, they will be ready for a new home outside.  Lots of fun with fennel!

Shared On: Eco-Kid's Tuesday , Kid's Get Crafty. It's Playtime!, The Kid's Co-op, Friday's Nature Table

Ginger Day ~ Herbs for Kids ~

Ginger Day ~ Herbs for Kids ~

Not long before holiday break we had a lovely day playing with ginger and doing one of the kids' favorite activities, foot soaks!  This is a great way to spend a cold winter day especially if little ones are passing any sort of cold around as it stimulates the immune system and helps kids relax.

Read More

The Best of Mama Rosemary 2012

Happy New Year! Before we move on into the transformation that 2013 promises, I wanted to share the top five viewed posts from Mama Rosemary during 2012 plus a few of my personal favorites that you may  have missed along the way...

Thank you for taking the time to read and comment.  I truly value each and every one of you!

Most Viewed Posts Of 2012

Inside A Flower

Have you ever looked inside a tulip?  There is a lot going on!

Have you ever looked inside a tulip?  There is a lot going on!

Playing With Peppermint

Hands-on aromatic fun!

Peppermint Art Work

Some Sweet Foot Lovin' For Mother's Day

The perfect present for mom because it is cute and relaxing at the same time.

Foot Print Butterfly

Butterfly Circle

A study of the butterfly life cycle.

Butterfly Circle

Cinnamon 'n' Spice Ornaments Craft Style

Aromatic crafting for the holiday season!

Ornaments

All Natural Candy Cane Bath Salts

And an honorable mention.  Mentioned because it was not posted in 2012 but got a lot of attention

and hopefully gave some folks a fun herbal craft idea to try!

Candy Cane Bath Salts

Some Of My Favorite Posts From 2012

An Aromatic State of Mind

This was by far one of my favorite activities I have ever done with the kids at preschool.

It was just so much fun!!

Happiness

At Long Last An Essential Mommy Time Out

Mommies need a break too!

Meditation Friends

Creating a tool for helping kids with their emotions.

friends

Fairy Crowns And Mint Magic Cookies

Tasty fun for a summer day!

yummy!

Violet Equinox

Cute little kids learning about beautiful violets.

Little hand holding a fresh picked violet

Best wishes for a wonderful new year!  May it be full of what ever you are wishing for!

Playing With Peppermint ~ Herbs For Kids ~

It is yummy.  It smells good and has tiny enchanting purple flowers.  Peppermint is a great herb for kids.   And this week at school we had a lovely time playing with peppermint.

We started with a peppermint tea tasting at snack time.  Everyone loved the tea, well, almost everyone.  There were a couple of skeptics at the table.  I was really impressed with how excited the kids were about the tea and how much they drank.  One little girl asked for about four refills!

Besides being super tasty, peppermint tea is great for digestion and enhancing immunity.

Here is how I made our kid friendly tea.  One handful of dried peppermint leaves went into a 1/2 gallon canning jar.  After covering the leaves with boiling hot water, I let the mint infuse for about 15 minutes.  Then I strained the leaves out and our tea was ready.  I did this in the morning before school started so the tea had plenty of time to cool down to a nice warm drinking temperature.

Our activity for the day was very hands on and simple.  First we sat on the rug and I gave each child a sprig of peppermint.  We looked at the stems and leaves.  We felt the square stems and talked about squares.  Then we ran our hands up and down the peppermint and gave it a good sniff.    Lots of big happy eyes looked back at me while they experienced the freshest peppermint fragrance.  One boy exclaimed that his peppermint smelled like zucchini!  So cute.  I explained to the kids that they were smelling the essential oil in the plant.  Like the essential oil we used in our aromatic playdoughthe week before.  We looked at the tiny purple flowers and talked about the plant making seeds.

Next I set up paper, glue, scissors, sunflowers and lavender, and lots of peppermint at our art table.

 The idea here was free time to just create with plants for a chance to get up close and personal.  Cut them up and see what is inside.  Get to know the plant through smell and feel.  Glue them down and create something.  One imaginative little boy made a map!

We also used our plants to make super simple wands but just binding plants together with ribbons.

What simple fun ways do you play with kids

and plants from the garden?

Shared on: The Kid's Co-op, It's Playtime!, Living Green, Natural Living Mama, Science Sparks

A Happy First Day of Preschool With Calming Aromatherapy

The new school year is quickly approaching for us at our very sweet little preschool.  Some of the kids will be coming to school for the very first time.  In fact they may have never been away from their mama.   Because needless to say, for some kids (and their parents too), the first day of school can be intimidating, scary and even a bit traumatic.  I know I sat in my car and cried for a good twenty minutes after I dropped my oldest daughter off on her first day of preschool. Every year on this very special day we help the kids adjust to their new environment by offering a time-honored and much loved activity, playdough, made a bit friendlier with the addition of calming essential oils and herbs.

Playing with playdough on its own provides stress relief through tactile squeezing and massaging of the smooth squishy dough.  With essential oils added the child instantly gets all the benefits of aromatherapy.  Breathing deepens as the oils are inhaled calming the mind and body,  bringing about a sense of peace.  Read Herbal Playdough for more info on the benefits of playdough and to get some great ideas for making your own colorful fragrant completely chemical free playdough. It is fun to let each child custom make their own playdough to take home.  They have something fun they made to share with their family at the end of the big day.

Materials you will need:

Prepared Playdough or you can make the playdough with the kids. Here is my favorite recipe:

  •  1 cup of flour 
  • 1/2 cup of salt
  • 1 cup of water
  • 1 1/2 tsp cream of tartar
  • 1 tbsp oil

Combine dry ingredients in a sauce pan.  Add the water and oil.  Stir together and heat slowly over low heat.  Stir almost constantly until the playdough sets up.  Let it cool to warm before playing, playdough right off the stove is hot.

Food Coloring (Please note that I am searching for affordable coloring made from natural materials that are healthy.  I do use powdered herbs for coloring when making a large quantity of one colored playdough for the school, yet I need something wonderful for coloring playdough when we are making personal playdough for taking home.  If any one has a source, please share!)

Essential Oils  I like to offer lavender, sweet orange, cardamon, spearmint, rosemary and rose geranium.

Dried Herbs like lavender blossoms, ground cinnamon and rose petals

Glitter 

Here is how I do this fun activity:

  1. Give each child a nice blob of playdough and some playdough toys.
  2. Have them pick out one color from your food colors to add to their playdough.  Put a couple of drops of food coloring in their playdough and start mixing it in for them so they don't get a big blob of food coloring on their hands.  You will have rainbow hands at the end.
  3. Let everyone smell the essential oils.  I usually talk with the kids a bit about smelling the oil by inhaling, not exhaling.  And then we practice.  I tell them to be sure not to touch their nose to the bottle.  This keeps the oils clean and safe for everyone to use.  Then let them choose which oils they want in their playdough.  I have found that most kids will want every oil!
  4. Have the child make a hole in the playdough.  Then you place a drop or two of oil in the hole and take a moment to personally squish up the oil into the playdough so that the oil doesn’t come into direct contact with the child’s skin. It is safe once it diluted into the playdough.
  5. Offer herbs and glitter for the kids to mix into their playdough.  Just dust a bit over the top of their playdough or make a little pile on the side for them to add in.  Some kids find the glitter and herbs to be "sharp" but usually they love adding in more and more as they go.
  6. When the child is done playing, bag up their playdough so they can take it home at the end of the day.

How do you welcome little ones to your school for that first big day?  I would love to hear all about it! 

Well, the first day has come and went.  We had a blast making our playdough.  Some of the kids made some really neat pieces of art with their playdough and all the additions we used.  Fresh lavender stalks became trees and dried roses became lava.

Enjoy the pictures!


Please Note about essential oils: Essential oils are concentrated plant substances.  They are dangerous and should not be used unsupervised around children.  Always keep the oils up and out of reach when you aren’t using them and be sure that an adult is the one who holds and uses the bottles.  I tell the kids that the essential oils are for teachers to use.  Some oils smell like really yummy food, so please do be careful.  Use mild oils like the ones listed above.

Shared on: The Weekly Kid's Co-op, DJDaniel4's Mom, Charlotte Mom Favorites

Butterfly Circle

The magic of butterflies and caterpillars captivates children. A flitter of colorful wings...

A fuzzy, fat, stripey bug creep crawling up a branch...

Discovering nature's treasures like these instantly engage and enchant children (and me too!).

What better insect to choose for a close-up look at life cycles?  Last week we studied plant life cycles at the school so the children were already familiar with the idea.  I brought in an example butterfly life cycle that I had made with art scrapes from my stash: pompoms (perfect for caterpillar bodies), silk flowers and leaves (leaves to lay eggs on and flowers to pull apart and use for wings), pasta shells (cocoon) and multicolored popcorn (eggs).

As we sat in a circle, I shared the butterfly life cycle with the kids we talked about being scientists by looking at the world and observing what we see.  We read The Very Hungry Caterpillar by Eric Carle.  As we read, we looked for parts of the butterfly life cycle.  We found the egg, and the cocoon and the butterfly; the kids really got it and I was impressed!

Next the kids made their own butterfly life cycles.

I gave them each a leaf to glue down on a piece of paper and then encouraged them to lay "eggs" on their leaves.

On we went including parts of the cycle.  I always love to present children with an idea and then let them take it from there and we had many creative life cycles when all was said and done!

Inside a Flower

Flowers fascinate me, they always have.  I can remember spending many happy hours in my parent's garden fondly stroking tulips and talking with snap dragons, or rather making them talk to me.  The colors and scents, how can something so amazing grow right out of the ground?

Plant Life Cycles

We are studying life cycles at preschool as part of out Earth Day curriculum for the month of April.  We set up a  plant life cycle on our science table.  Into seed pots we planted marigold seeds and then set them up right next to a full-grown marigold plant, with the seeds next the plant.  The goal is to give the kids a visual experience of a life cycle while we wait for our baby plants to sprout.

As part of this we read the book: Seed to Plant by Melvin and Gilda Berger.  This is a great book with wonderful pictures seeds and plants at different phases of the life cycle.  It really helped the kids to understand the process.

Plant Life Cycle Game

We also played the life cycle game.  Each kid pretended to be a tiny seed planted in the ground (they get in a ball on the ground).  While I pretended to water them as the sun came out and the kids began to grow into a plant (they stretch up towards the sky on their feet), and next the kids  sprouted flowers (what color is your flower?) that made seeds.  The seeds blew away in the wind (we waved our arms) and landed back on the earth (the kids end up back in a ball on the ground).  They loved this game!  It was a great visceral way to experience a plant life cycle.

Flower Exploration

My love of flowers prompted me to bring in a bunch of flowers and talk about where the seeds are made in a flower. I brought in tulips for us to explore together.  After we reviewed our plant life cycle, I got ready to cut apart a tulip with the kids.  At first they were sad about hurting the tulip.  These are some sweet kids!  But as I started pulling the petals back they became totally engaged in what they were seeing.

"Whoa!  Ms. Angela, what is that?"  All heads were bent peering closely as were investigated our tulip.

I pointed out the anthers on the flower and we talked about pollination.  We felt the slightly gritty pollen dust on our fingers.  I was fortunate to have a lovely book, The Dandelion Seed,with me with an illustration of a bee covered in pollen which gave the kids a good visual for pollen transfer via insects.

The Dandelion Seed by Joseph Patrick Anthony is simply beautiful.  The story is profound and engaging while the illustrations are incredibly lovely.  In fact I cry just about every time I read it!

Then I showed them the pistil, the part when the pollen lands and fertilizes the flower to make seeds.  We cut into the pistil but weren't able to see much even with our magnifying glass.

I also brought in some lilies for the kids to explore.  Each child got a lily anda  coloring sheet showing the parts of a plant (click here for a link to this great coloring sheet).  The kids pulled apart their flowers and glued them to their coloring sheet.

We had a great time being scientists and learning about the mystery of plants and flowers!

Shared On:  It's Playtime!Eco-Kid's TuesdayKid's Get CraftyFriday's Nature Table and at one time The Kid's Co-Op