A Fairy Garden for Mother's Day ~ Planting & Landscaping
/
Have you painted your pots?
Sprouted your seedlings?
Or perhaps bought some lovely plants at the nursery for your garden?
Yes??
Then you are all ready to plant and landscape your fairy garden!
~ Materials ~
painted and dried pots
large rocks or coffee filters
soil
plants and seeds, see Perfect Herbs For A Fairy Garden below
decorative rocks
popsicle sticks or little signs
sharpie
optional ~ Take a look around your local craft store or plant nursery for fairy sized furniture, little grapevine trellises & wreaths, tiny mushroom birds & ladybugs and butterflies. Really anything that strikes your fancy is great to add to a fairy garden!
~ Perfect Herbs For A Fairy Garden ~
Do you need edible fragrant herbs for your fairy garden?
Visit your local nursery for seedlings or seeds of any of the following herbs.
lemon balm & chamomile
any of the mints
thyme
calendula
violas & pansies
oregano
anise hyssop
lavender
even miniature roses
“The Fairies love thyme.
It’s one of the plants they like to dance around!”
- Rosemary Gladstar

Since we are making our fairy gardens at preschool we are keeping it nice and simple by just using decorative rocks for our pathways and popsicle sticks for our signs. You can make your garden as fancy or as simple as you want but make no mistake, it will be sure to please mommy!
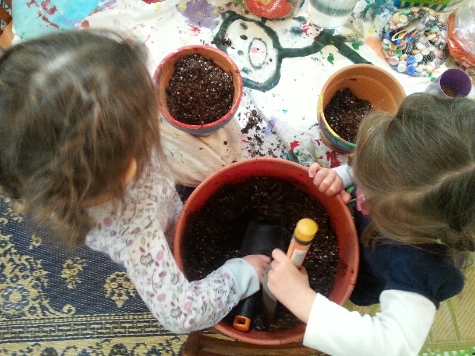
~ Step One ~
Filling The Pot
To start I had each child choose a large rock for covering the hole in the bottom of the pot so as to keep the soil in the pot while letting the water drain out. You can also use a coffee filter for this task. Then we filled out pots with potting soil. To make things easier, I pre-moistened the soil before we got started planting. You certainly don’t need to do this but it did cut down on the dust and mess which was nice because we were planting our pots inside!
~ Step Two ~
Planting
Help your kiddo plant their little sprouted seedlings or seeds. Our lemon balm plants didn’t sprout as well as I would have liked so we planted our little chamomile plants and added some flax seeds to our garden as well. I am hoping they will grow beautifully!
Encourage your child(ren) to plant their seeds in one spot instead of spreading them around the pot so they will have room to make a fairy pathway.
~ Step Three ~
Landscaping
Once your plants and seeds are in place it is time to landscape. Set out the lovely rocks you have collected and let you child create a pathway for the fairy. I found that I needed to explain to the children that put rocks on top of the seeds would make it hard for the seeds to grow, so you may want to keep an eye out for that. Add any little garden furniture you have purchased and little animals. You may want to use hot glue to secure ladybugs and birds to their perches!

We also made little signs for mom with popsicle sticks. I asked each child what they wanted to say on their sign which I put on one side of the sign and then we signed their name on the back with a heart for love!
Some of my favorite messages to mommy are:
“Momma, I love you!”
“Mommy’s Fairy Garden”
and of course...
“Happy Mother’s Day!”

Next week we will finish our Mother’s Day gifts by making a little fairy to tend each garden!
DON’T FORGET…
~ Each Garden Will Have ~
Fragrant Edible Herbs
Lovely Garden Paths
A Personalized Kid-Made Flower Fairy To Tend The Garden
Fairy Sized Tools & Garden Accessories
A Beautiful Painted Pot
Join us and create your own fairy gardens for Mother’s Day.
These little gardens make the perfect for grandma too!
Week One ~ Planting Seeds
Week Two ~ Painting Pots